
These days, an increasing number of developers have started building side projects, whether to explore new technologies, contribute to the broader tech ecosystem, or just for fun. With the rise of LLMs, developers now have access to a wider range of tools and assistance than ever before.
Meanwhile, open source has become a cornerstone of modern software development. Many of the most influential tools in use today were open-sourced by big tech: TensorFlow, Kubernetes, and Angular from Google; React and PyTorch from Meta; and VS Code and TypeScript from Microsoft. These projects not only exemplify technical excellence but also embody the spirit of collaboration and shared progress.
On the other hand, individual developers can also participate in open source projects in meaningful ways. Broadly speaking, there are two common paths for them to choose.
The first is straightforward, just contributing to an existing open source project. Whether you want to sharpen your current skill set or learn a new tech stack, there’s likely a project that could use your help. Pick a repo, find an issue, submit a pull request. It’s a great way to improve your capability.
In contrast, the second path, which this article is all about, is turning your own side project into an open source initiative. In other words, take that weekend project you’ve been tinkering with, tidy it up a bit, and open it to the world.
The reasons for open-sourcing
Open-sourcing a personal project can bring benefits from various perspectives. Not only from a technical standpoint, but also in terms of friendship, career advantages, and personal fulfillment. Let’s open up and talk about the reason, the “why”, for going open source.
Technical Growth
Typically, your project isn’t ready to be open-sourced right out of the gate. You’ll likely need to clean up the code, write documentation, and remove any sensitive information, for instance, API keys. That process alone teaches you to write cleaner, more maintainable code, which is undoubtedly essential.
You’ll also find yourself picking up new tools. The exposure to real-world workflows is a treasure during the open-sourcing process. Tools like Git, Docker, and different CI/CD pipelines will become your confidant on the journey and help you level up fast.
Learning from the community
Community is definitely the essence of open-sourcing. Learning through the feedback from experienced developers and software veterans can give you valuable lessons. Their advice and contributions will be precious, not to mention, the friendships you may form.
Career and Reputation Building
Imagine you’re applying for a position where you’re confident you have the required skills. Typically, we convey that message, “I’m the best choice”, through a one-page resume. However, it’s relatively hard for companies to differentiate each applicant in such a limited format. Conversely, with an open-source project, you can promote yourself and greatly convince recruiters.
What’s more, developing an open-source project includes not only the technical aspect, but also resource management, business thinking, and strategic planning. You could build your reputation and broaden your career opportunities at the same time.
Steps for open-sourcing
Get your code prepared
On top of everything, clean and safe code comes first, if you already finished a project and are planning to open source it.
There are two main reasons why it runs on your machine doesn’t mean it’s ready for the world.
First, we all have our own coding habits. What makes perfect sense to you might confuse others when they read your code. That’s why making your code more readable is crucial at the very beginning.
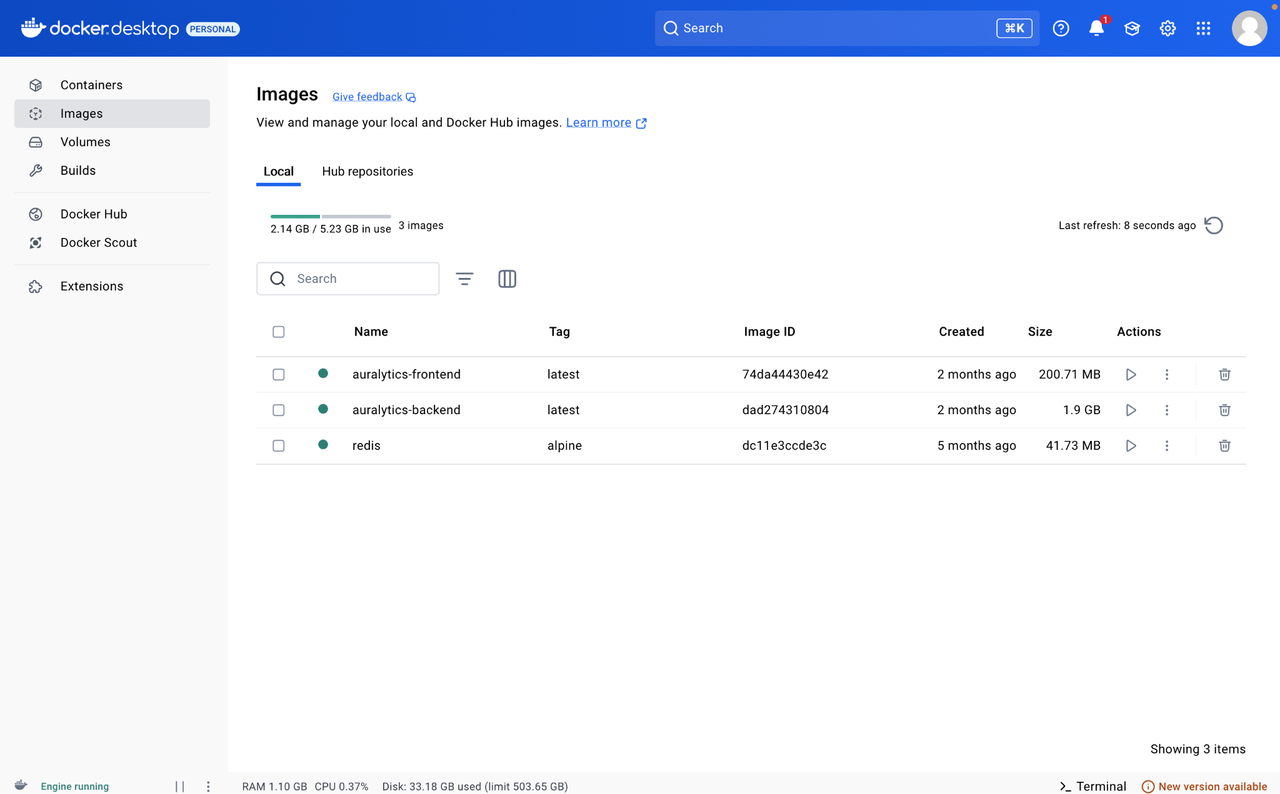
Second, your code might contain private information. For example, when I was building my open source project, Auralytics, I had API keys and Redis credentials directly written in my source code. There’s absolutely no reason to expose that frankly.
When it comes to coding style, there are plenty of resources online. So here, let’s focus on code safety.
Typically, we store private information in a .env file. When preparing a project for open source, you should replace it with a .env.example file and use placeholder values like YOUR_API_KEY. That’s a great way to lead the developer create the environment variables properly.
# instance of .env.example

# Spotify Developer Credentials
CLIENT_ID=your_spotify_client_id
CLIENT_SECRET=your_spotify_client_secret
REDIRECT_URI=http://localhost:8888/callback

# Application URL (Frontend)
FRONTEND_URL=http://localhost:3000

# Redis
REDIS_HOST=localhost
REDIS_PORT=6379

# Optional
PORT=8888
Make It Cloneable
Cleaning up the code is beginning, for the next step, you could put it somewhere people can explore it, usually Github.
You might initially believe the other developers could easily transfer or clone your project to their machine, yet, sometimes unexpected error emerges. On the other words, when someone clones your repo, they should be able to run it with minimal effort. That’s how making the code cloneable so vital.
Following, we’ll introduce two simple methods for you. While adopting both is strongly recommended, you could also choose one of them and utilize it when uploading your project to GitHub.
1. Upload along with key files
Make sure to include the stack information and dependency, for instance, the file such as package.json, package-lock.json. By this simple way, you don’t need anything complicated, yet, please ensure that others could install the proper packages and dependency when build and run your project.
2. Dockerize It
Docker is a powerful tool for ensuring consistent environments across different machines. Packaging your app in a container means anyone with Docker installed can run it the same way, no matter what OS or setup they have. In other words, you upload your code without worrying about “it only works on my machine.”
To Dockerize a project, you typically need two files: Dockerfile and docker-compose.yml.
Dockerfile defines how to build a single container for your application. For a detailed explanation, you can check: Writing a Dockerfile.
docker-compose.yml defines how multiple services work together. For example, if your app connects to Redis or MongoDB, you can bring everything up in one go. For further explanations, you can also check: Use Docker Compose.
There are some quick tips:
- Use
env_fileto inject environment variables safely. - Add
depends_onif your app relies on another service. - Use volumes if you need persistent data or want to map local code during development.
- Avoid hardcoding secrets—keep them in
.env, and don’t forget to.gitignoreit.
Once you're ready, just run:
docker-compose up
And you're off to the races.
Build up a meticulous README
The README file can directly influence whether other developers decide to engage with your project. An intricate or incomplete README can be catastrophic when someone is eager to participate. The README serves as the full introduction to your project, guiding users from installing dependencies to running the project locally. Typically, a README includes the following parts:
Project Introduction
Briefly introduce the origin of the project, such as why you built it. Additionally, the features of the project should be clearly articulated in this section.
Prerequisites
What should developers do before starting? For example, if an API key is required, you should clearly state that in this section.
Tech Stack
What technologies and tools are used in the project? This section is important because developers will assess whether the tech stack aligns with their skill set, or alternatively, whether they’re interested in learning the tools you’ve used.
Instructions for Running the Project
Provide detailed instructions on how to run the project on a local machine. For this part, you should be careful to avoid any possible errors.
Contributing
Explain how developers can contribute to your project with concrete steps. Additionally, you can mention specific areas where you would appreciate contributions.
License
Indicate the license you've chosen. We'll go over licensing in the next chapter.
Contact Information
Include your preferred contact method so developers can reach out if they encounter any problem.
Choose a license
Choosing an open-source license is not just a legal formality, it defines how others can use, modify, and redistribute your code. A clear license protects both you and your contributors, and it sets expectations for how your project may be integrated into other systems or commercial products.
Below are some of the most commonly used open-source licenses. Each comes with its own philosophy and practical implications.
MIT License
Best for: Maximum freedom with minimal conditions.
The MIT License is one of the most permissive and widely used open-source licenses. It allows anyone to use, copy, modify, merge, publish, distribute, sublicense, and sell copies of the software, as long as the original license and copyright notice are included.
Apache License 2.0
Best for: Business-friendly projects that also need patent protection.
Apache 2.0 is also a permissive license but adds an important clause: it includes an explicit grant of patent rights. This makes it a strong choice for companies or individuals concerned about software patents.
GNU General Public License (GPL v3)
Best for: Projects that must stay open source and want strong copyleft.
The GPL is a “copyleft” license, meaning any derivative work must also be licensed under GPL. If someone modifies your code and distributes the modified version, they are required to make it open source as well.
Mozilla Public License 2.0 (MPL 2.0)
Best for: Middle-ground between permissive and copyleft.
MPL requires that modifications to files originally under MPL also be shared under the same license, but allows those files to be combined with proprietary code. It’s a balanced choice for developers who want contributions back without enforcing full project openness.
Unlicense / Public Domain
Best for: Releasing your code with zero restrictions.
The Unlicense effectively places your code in the public domain, waiving all copyright and licensing rights. It allows unrestricted use but offers no warranties or protections.
When selecting a license, ask yourself:
Do I want others to be able to use the project commercially?
Do I expect contributors to share their changes?
Is patent protection relevant to my work?
Am I okay with my project code being used in proprietary software?
If you’re unsure, the MIT License is a safe default for most personal and collaborative open-source projects.
To officially license your project, you can select the license when establish the Github repo, adding a LICENSE file at the root of your repository, and declare the license in your README.md.
Promoting your project
Publishing an open-source project is only the first step. If you want your project to gain visibility, attract contributors, or even find real-world adoption, you’ll need to actively promote it. Fortunately, there are many platforms and communities where developers share, discover, and collaborate on open-source work.
In this section, we’ll explore several well-known platforms, their respective strengths, and how to effectively showcase your project.
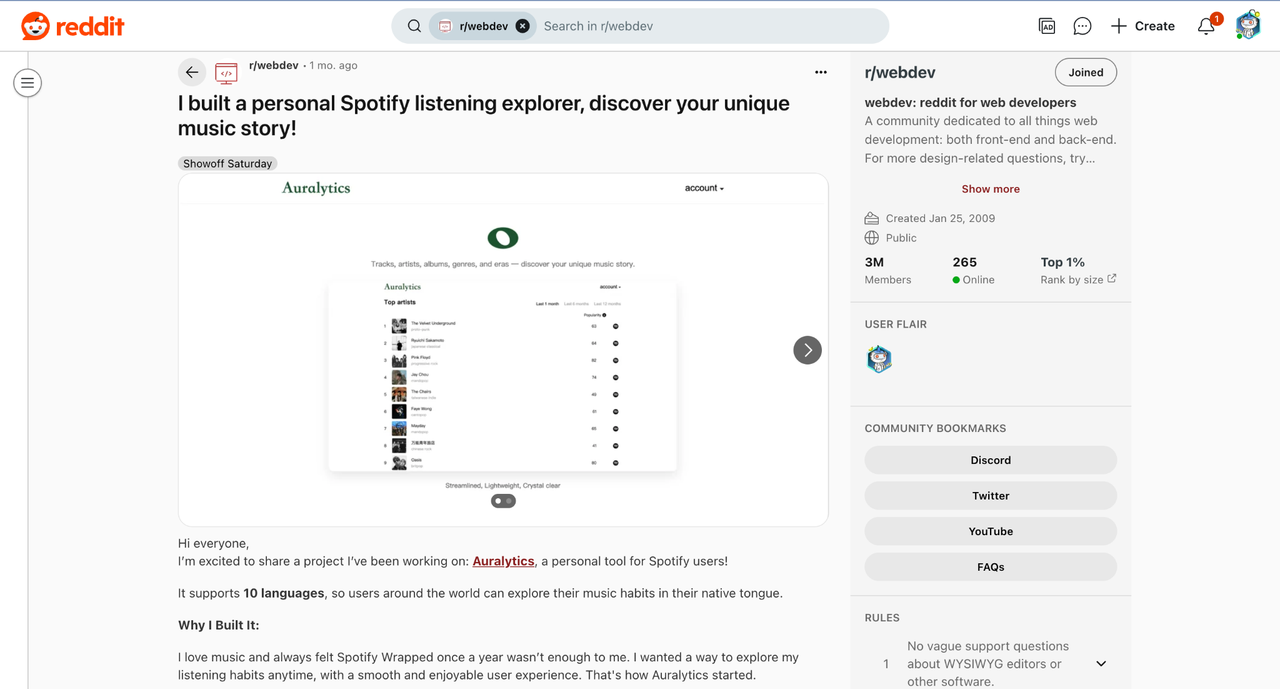
Reddit has several active communities where indie and open-source developers regularly share their work. Three subreddits particularly worth mentioning:
r/SideProject: A welcoming community for solo builders and hobbyists. You can share your journey, ask for feedback, or just talk about what you're building.
r/webdev: This community often has a weekly thread like “Showoff Saturday” where developers are allowed to showcase their projects.
r/opensource: A smaller but highly focused subreddit for open-source specific discussions.
Don’t just drop your link, more explicitly explain your motivation, your tech stack, and the story behind the project. Authenticity goes a long way on Reddit.
Product Hunt
Product Hunt is designed for launching new products and tools to a broad tech-focused audience. While it’s not limited to open-source software, you still can find someone who may be interested in your project.
On Product Hunt, it is most effective when your project is nearly complete and you can provide a live demo to users, giving them a clear idea of what your product does, how it works, and why it matters. A polished presentation not only builds credibility but also increases the chances of gaining traction and meaningful feedback from the community.
Indie Hackers
Indie Hackers is ideal for telling the story behind your project. If your open-source project is part of a bigger personal journey (e.g., learning to code, building in public, solving a niche problem), Indie Hackers is a great place to share your thoughts and connect with others.
You can also share follow-up posts as your project evolves, which helps build long-term visibility.
Hacker News
Hacker News values substance over hype. You should avoid a promotional tone, and instead focus on what you built, why, and how. It is a great place for:
-
Technically interesting open-source tools
-
Tools that solve a real problem for developers
-
Launch announcements with engineering insights
And a required format is posting to "Show HN", with a title like:
"Show HN: Auralytics – An open-source Spotify listening insights dashboard"
Conclusion
Open-sourcing a personal project is a rewarding milestone. It transforms a private effort into something greater to give back to the community, and to grow both technically and professionally. But as with any public-facing endeavor, open-sourcing also comes with responsibility.
Once your project is online, it’s not only your friends or fellow developers who can access it. It might also draw the attention of gray hat hackers. These are individuals who explore public codebases, often not with malicious intent, but out of curiosity or a desire to test security boundaries. Some may even request payment after discovering vulnerabilities. If your project includes hardcoded API keys, admin credentials, or insecure logic, it could be exploited or leaked without your knowledge.
Another common issue is phishing attempts. Developers who publish their emails in the README or in commit metadata may receive deceptive messages, sometimes pretending to offer contributions or bug reports, but containing malicious links or social engineering attempts. It’s important to remain cautious and verify the identity and intent of unsolicited contacts, especially when they request repository access or admin privileges.
These risks are not reasons to avoid open-sourcing, but they are reminders to approach it professionally. Just as you wouldn’t deploy a production system without securing it, you shouldn’t publish your code without reviewing it for sensitive data and potential vulnerabilities.
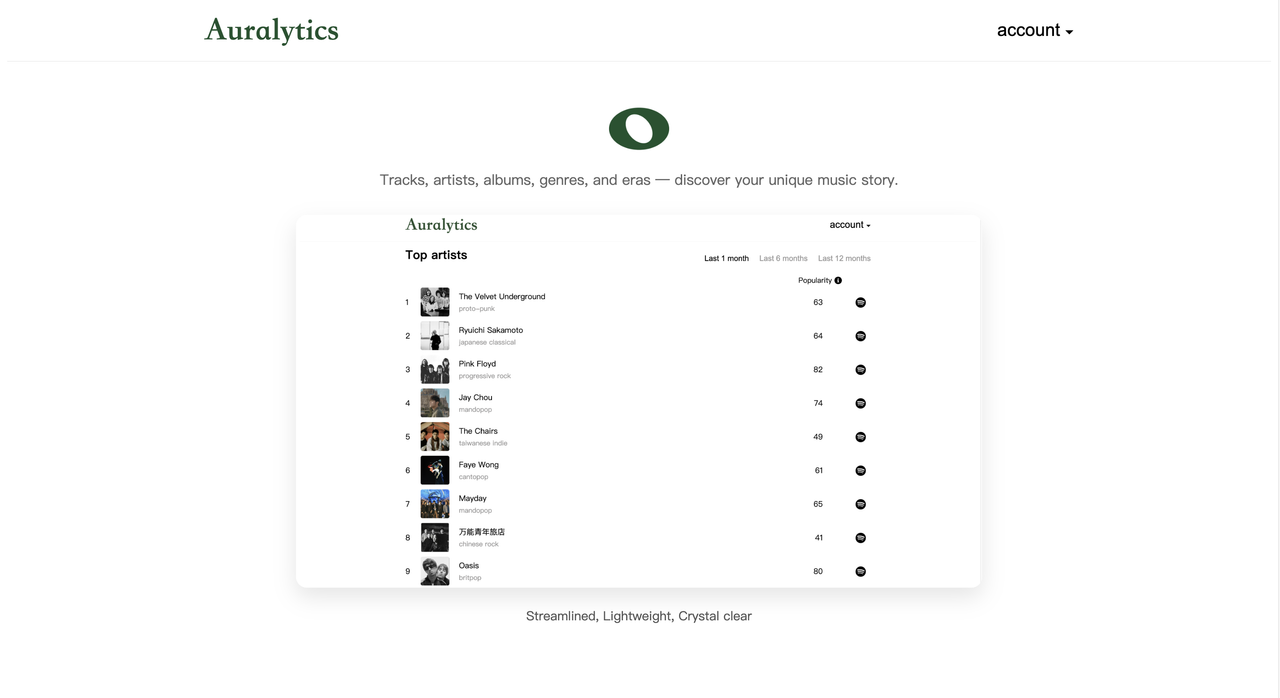
Auralytics is an open-source project designed to provide in-depth insights into users’ Spotify listening habits. It currently supports 10 languages. By leveraging Spotify's API, Auralytics provides users with their top tracks, artists, albums, genres, and musical eras.
The official version of Auralytics is now available. We just ranked 54th out of 195 startups on Product Hunt.
If you’re interested in exploring the code or contributing, you can visit our GitHub repository:
It contains the open-source local version, allowing developers to run Auralytics locally and contribute improvements. We actively review and merge valuable contributions into the production environment.